Sounding Pipes, Edition 2

Easy access to streamed music is one of those things we take for granted these days. But it wasn’t so long ago that if you wanted to listen to a particular piece of music you had to go out and buy the CD, or at least borrow it from your local library. One of the things I love about our access to music now is the way it can take you down all sorts of rabbit holes, bringing fresh discoveries.

It seemed about time I created another of my Sounding Pipes playlists, so over recent weeks I’ve been rummaging on YouTube and elsewhere for gems to share with you. My choices are all linked to the recorder in some shape or form, even if the music isn’t entirely played on our favourite instrument.

G.F.Handel - O ruddier than the cherry from Acis and Galatea

William Christie and Les Arts Florissants

The Love of Acis and Galatea by Alexandre Charles Guillemot

Handel described Acis and Galatea as a “little opera” in a letter to a friend during its composition, but it’s since been called a serenata, masque and oratorio by others. However you wish to classify it, Acis and Galatea is one of Handel’s most enduringly popular works. Written in 1718 while working for the 1st Duke of Chandos in Cannons, north London, this was Handel’s first dramatic work in the English language. It features three major characters - the shepherd Acis, Galatea (a nymph) and Polyphemus, a monstrous giant, who features in this aria. Having just sung about his jealous love of Galatea (“I rage, I melt, I burn”) he then bursts into song with “O ruddier than the cherry”, accompanied by strings and a sopranino recorder!

I was lucky enough to play recorder in a performance of this while studying for my A level exams and I’ve had a soft spot for the work since then. Handel’s juxtaposition of the tiniest of recorders alongside the bass voice surely couldn’t fail to make anyone smile!

Gordon Jacob - Suite for recorder and strings

Annabel Knight and the Maggini quartet - Gordon Jacob Chamber Music with Recorder

The search for a modern recorder concerto which can hold its own against other instruments came to the fore some years ago when Charlotte Barbour-Condini and Sophie Westbrooke both made it to the concerto final of the BBC Young Musician competition in quick succession. Finding a work for recorder which contrasts favourably with large scale Romantic concertos is a challenge, especially as our instrument naturally suits a more intimate setting. Sophie chose to perform Gordon Jacob’s Suite for recorder and strings, albeit augmented with wind instruments (an arrangement made by an old school friend of mine, David Knotts as it happens).

This is a work I love very much and had the honour of performing in Chichester Cathedral many years ago. Here I’ve chosen Annabel Knight’s performance which goes back to its roots, accompanied by the more modest forces of a string quartet. I’ve always had a soft spot for this beautiful Lament, which combines a doleful melodic line and some exquisite string harmonies. Gordon Jacob (1895-1984) wrote several works including the recorder, but was adept at creating beautifully crafted music for any instrument. His catalogue includes concertos for no fewer than sixteen different instruments! Reading about him, I was fascinated to learn he studied with Ralph Vaughan Williams, Charles Villiers Stanford and Herbert Howells while at the Royal College of Music - a real who’s who of composers. Later in life he returned to the RCM as a teacher himself and Malcolm Arnold was one of his students - another composer who later wrote works for the recorder.

Samuel Scheidt - Canzon on O Nachbar Roland

Seldom Sene - Concerto Barocco

The Canzon (or canzona) was the forerunner to the sonata. Ultimately the sonata matured into a multi-movement work, but during the Renaissance the canzona instead featured shorter sections whose tempo and metre varied, while fundamentally remaining a single movement work. Sometimes, as in this case, they were based upon well known melodies or chord progressions.

I first encountered O Nachbar Roland at the Recorder Summer School when I was a teenager. Five of us worked on it in our spare time, with a plan to perform it in the students’ concert at the end of the week. During rehearsals we worked diligently on the transitions between the sections, but also made a plan for what we might do if anyone came unravelled due to nerves. Ultimately our cunning plan was vital as no fewer than three of us came adrift in one section. Unperturbed, we regrouped at the next tempo change and continued as if nothing untoward had happened!

I’m pleased to say Seldom Sene’s performance of O Nachbar Roland is altogether more polished than ours. I love its exploratory nature at the start - each part coming in tentatively until there’s sufficient group momentum for a definitive tempo to be set. While reading up about this piece I discovered a connection I’d never considered before. O Nachbar Roland was a popular tune in the Renaissance and many composers wrote pieces based upon it. However, I hadn’t previously realised its connection with Lord Peregrine Bertie Willoughby, a noted member of the 16th century aristocracy. His name may not be immediately familiar to you, but you may well know of him through William Byrd’s Lord Willoughby’s Welcome Home. The melody is a near doppelgänger of O Nachbar Roland, and was composed in Willoughby’s honour when he returned to a hero’s welcome in London after his victory in the Siege of Bergen in 1588.

Gioacchino Rossini - Overture: The Italian Girl in Algiers

Berlin Recorder Orchestra, conducted by Simon Borutski

When I encountered my first recorder orchestra in 1991 the sound tended to be a rather top heavy affair. The larger bass recorders were still relatively unusual in the UK and it was difficult to achieve a really pleasing balance of sound. How things have changed in 30 years! Today it’s not unusual to have half a dozen contrabasses in such ensembles and the number of even larger recorders is gradually growing too.

In recent months YouTube has offered me a steady stream of recordings by the Berlin Recorder Orchestra and I just had to share this one with you. They seem to have hit a sweet spot in terms of balance with a small forest of big basses in the back row, and relatively few of the high instruments. The result is a wonderfully mellifluous tone, complemented by some fantastic precision playing.

The Romantic period isn’t an obvious one to raid for recorder orchestra music, but this fabulous overture by Rossini is just a joy to listen to. I’ve played in and conducted it myself with different groups (albeit in a different arrangement) and it’s so exciting to be a be part of the excitement and drive which is intrinsic to Rossini’s compositional style. After you’ve watched this video, do have a rummage through the BRO’s YouTube channel because you’re guaranteed to find some more recorder orchestra gems there.


J.S. Bach Violin Concerto in A minor, BWV 1041

Andrew Manze and the Academy of Ancient Music - Bach Solo and Double Violin Concertos

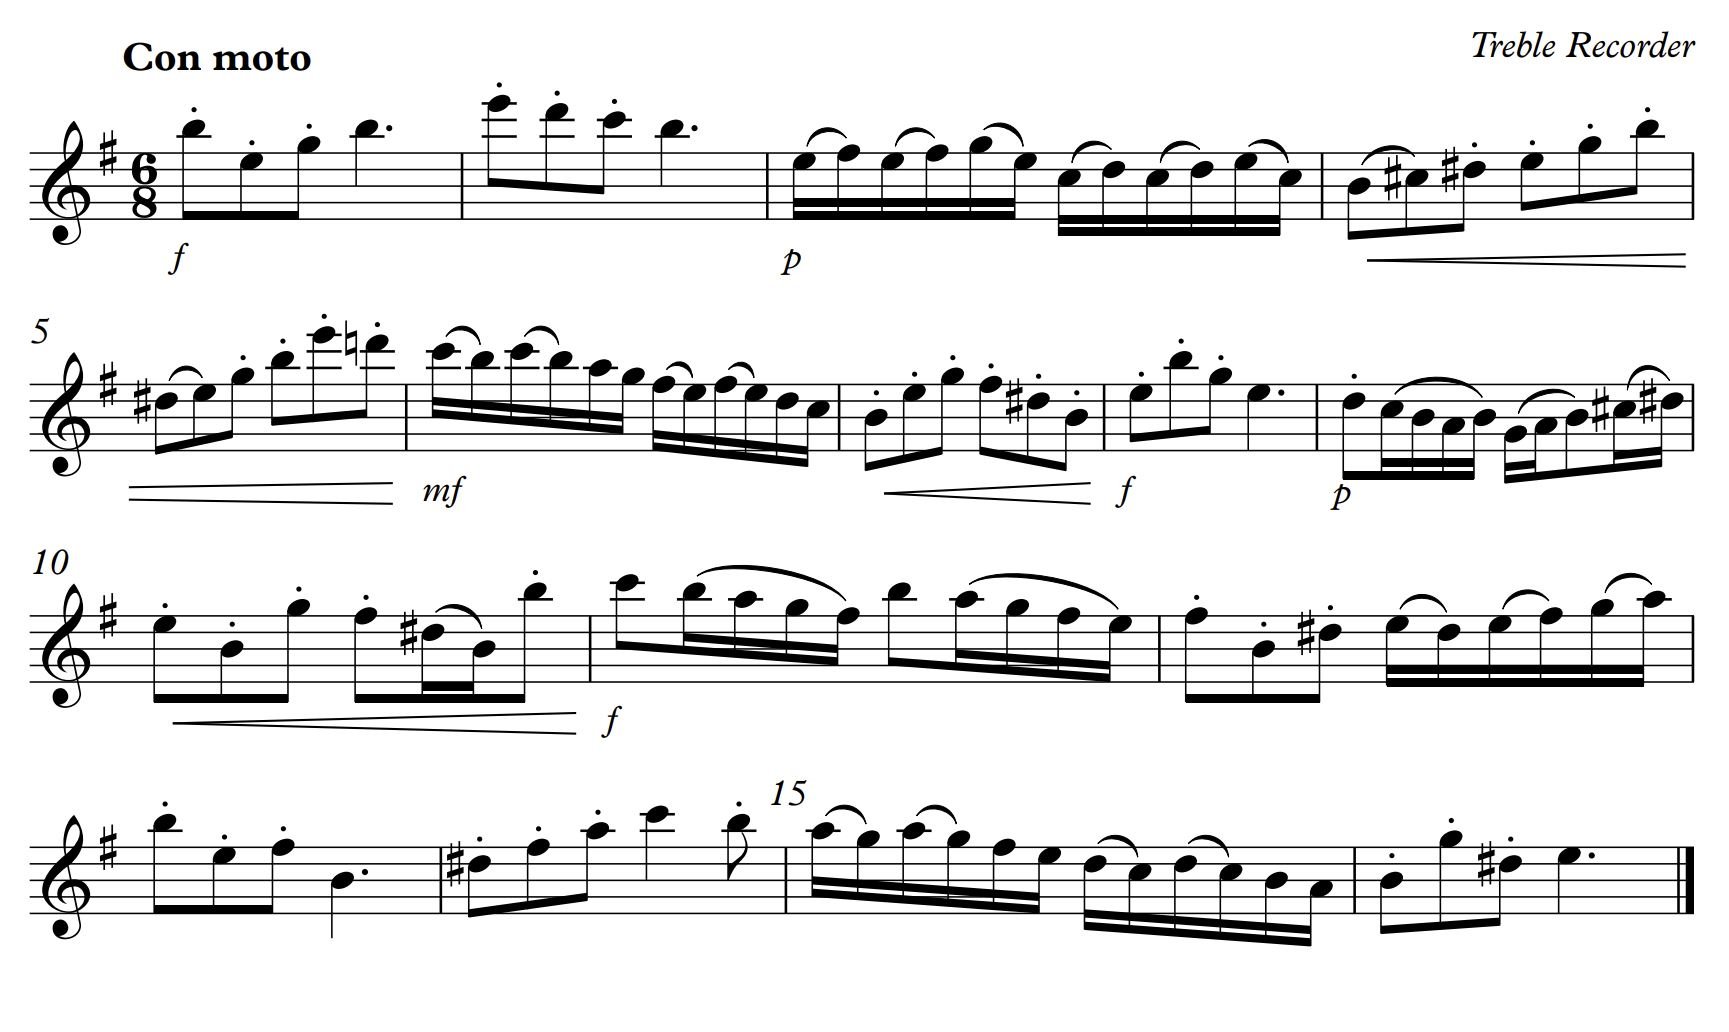
The recorder connection with this piece may be a little tenuous, but this particular album is one of my absolute favourites and is too good not to share. The first movement of this concerto appears as the centrespread of the June issue of The Recorder Magazine, in an arrangement by James Howard Young. Bach is always a challenge to play, as his music rarely takes into account the need for wind players to breathe. That small wrinkle aside, James’ transcription fits the recorder remarkably well and I have a copy of it on my music stand right now - an excellent workout for both brain and fingers. If you’d like to try the Bach for yourself but don’t have a copy of the June Recorder Magazine you can download the music by clicking on the button below.

This recording is 25 years old now, but I adore its energy and Manze’s effortless musicianship. These days he’s more likely to be found conducting orchestras, in repertoire which stretches well beyond the Baroque, but I recommend you listen to the whole album and explore his other recordings too.

Charlie Parker - Ornithology

Lucie Horsch and Fuse - Origins

My last playlist finished with a little frippery, so it seemed appropriate to do the same this time. This track comes from Lucie Horsch’s newest album, Origins, which will be released next month. A number of behind the scenes videos are already available on YouTube though and it’s wonderful to see her delving into this classic jazz number by Charlie Parker. While many of us enjoy jazz, it’s often played badly by recorder players. This always strikes me as a curiosity because so much of the Renaissance and Baroque music we play demands a similar spontaneity in its performance. I love Lucie’s relaxed demeanour here and it’s great to see the interaction between her and the ensemble Fuse.

Hopefully there’ll be something for everyone there. If you’ve discovered a wonderful new recording recently why not share it in the comments below for us all to enjoy - there’s a world of new and exciting music out so let’s explore it together!

Taking the stress out of sight reading

Do you relish first encounters with new music? Or does the thought of sight reading fill you with dread? Assimilating unseen music is an important skill for any musician, whether you’re taking your first steps or you’re an experienced player. The ability to play through fresh repertoire allows us to assess whether we wish to study it further, and in ensembles that fluency of reading is crucial if we’re to be a useful team player.

Think for a moment about what’s required of us when we’re sight reading. You’re reading a written language (much like reading text) and this tells us which notes to play and in what rhythm. Alongside this you have information about whether to play smoothly or detached, how loud or soft, tempo, character and more besides. When you consider the level of multitasking this requires it’s a miracle any of us can get from one end of a new piece to the other without falling over immediately! If sight reading is something you find difficult, don’t give yourself too hard a time - just remember how much you’re trying to do simultaneously.

Having made sight reading sound like an unscalable mountain, my aim today is to help you turn that mountain into a much smaller peak, or maybe a group of smaller hills. Sight reading may come more naturally for some people, but it’s a skill you can definitely improve with practice - just like any other aspect of musicianship.

Let’s take a look at what needs to happen when you’re given a piece to sight read…

One step at a time

It’s easy to panic when faced with a new piece of music but the best strategy is to break the task down into smaller chunks. Let’s consider the most important things to do before you play a single note….

Look at the key signature

Don’t just think to yourself, ‘There are two sharps”, but actually work out which ones they are - F sharp and C sharp. Finger these notes on your recorder so you immediately begin to build some muscle memory.

Check the time signature

How many beats are there in each bar and what sort of beats are they? The top number of the time signature tells you the number of beats, and the bottom number tells you the type. So 3/4 means three crotchet beats in each bar. If you’ve come to music in adulthood and missed out on learning the basics of music theory it’s worth seeking out some tuition to fill the gaps in your knowledge as this’ll help with sight reading too. A local music shop, if you have one near you, is a great place to ask about nearby teachers, and there are many online resources to help you learn about music theory. If this is something you’d like me to cover here, on the Score Lines blog do get in touch or leave a comment below.

Look for accidentals

Glance through the music and look for accidentals. Are there any ‘exotic’ ones which need translating - for instance a G flat is really only an F sharp in disguise. Recognising them in advance will help you play them with greater ease. While you’re at it, look for sharps and flats which repeat later in the bar - you could even pencil them in to remind you!

Check the tempo marking

What speed does the composer want you to play? You may not be able to play it at full speed immediately, but at least try to have any idea what might have been in his or her mind. Wikipedia has a great glossary of musical terms which is worth bookmarking for future reference.

Consider the tempo you’re going to play

You may have to play more slowly than the indicated speed at first, but you do need to have thought about it before you begin! Look through the rhythms to see how wide a range of note values you have. If the music begins with the fastest notes that’s handy, because you get an immediate feel for how whizzy the music will be. If the piece begins with slower notes you’ll need to think through the mathematical relationship between the note values so you understand their relative speeds. Pick a speed where you’ll be able to at least have a stab at the fastest notes, and don’t be afraid to subdivide the longer notes into smaller beats in your head if you need to.

Now look closer at the rhythms

Having taken a wide view of the piece, look a little closer. Look for any funky rhythms which don’t immediately look straightforward. Relate the rhythms to the beats and see if that helps you figure them out. Maybe tap or scat sing the rhythm to yourself initially so you’re not trying to cope with complex rhythms and the fingerings at once. You can also pencil beat numbers into the music if that helps you understand the rhythm more easily.

Check out the rest of the score

Finally, look through at the other markings in the music - articulation (slurs, staccato, accents), dynamics, ornamentation. You may not be able to put all of these in on the first reading, but knowing they’re there is a start. The most important thing is to get the rhythm and pitch first time out - if you can add further refinements that’s a bonus.


A practical example

Let’s put this into practice now and look at a real world example. This short piece comes from a book of practice sight reading pieces. It’s a grade 6 piece, but the processes we’ve just considered can be applied at any level. If you would prefer to try this piece for yourself on descant or tenor recorder you can find a transposed version here.

Click on the music to download printable version

So what jumps off the page at me when I first look at this music?

We have an F sharp in the key signature (E minor, but the name of the key is less important than knowing which sharps to play), with six quaver beats in each bar. The tempo marking, Con moto, means ‘with movement’ so I would probably try to feel two dotted crotchet beats per bar to achieve a sense of flow. If that makes the semiquavers too quick, there’s no reason why you couldn’t feel a quaver beat though.

Glancing through the bars, there are a few accidentals. Checking if any of them repeat during the bar, I see the D sharp needs to be played twice in bar 12. Looking at other details, there are slurs and staccato to be played. The articulation patterns are pretty consistent, with staccato on all of the quavers and most of the semiquavers slurred in twos. Finally, there are some dynamic markings. These tend to be further down my list of priorities as I feel it’s more important to get the notes, rhythms and articulation on a first read through. It all depends on how easily you can cope with everything else so don’t be afraid to prioritise the notes and rhythms if that means you can keep going without hesitating or stopping.

Coping strategies and survival skills

Like everything in life, sight reading is easier if you have some simple strategies in place to help you. If you work through the steps I’ve suggested above that’ll put you on the right path, but here are some handy tips to help you through…

Don’t stop!

I clearly recall my first experience of playing clarinet in the school wind band. We were playing Little Brown Jug by Glenn Miller and I’d only been learning about a year, so I was pretty unsure what to expect. My line was pretty easy, but still I made mistakes and I remember being confused when the band didn’t wait for me as I fumbled my way through! Sight reading an unaccompanied piece is a very forgiving experience - you can stop and start as often as you want. But, the moment when good sight reading skills really come in handy is in an ensemble setting, where the others simply don’t wait for you. Therefore it’s good practice to make yourself keep going at all costs, no matter what you’re sight reading. Drop notes on the floor, but keep the pulse going in your head - you can come back later for a post mortem on what went wrong.

Be methodical and get into a routine

Build good habits. Always working though a mental checklist of the details you need to check before sight reading a piece. If you do this methodically you’ll get into a routine and sight reading will become easier.

Look ahead

When we read words, we gain a sense of the meaning by reading ahead a little, taking in more than one word at a time. This allows us to understand whole sentences, rather than just single words. Music is just the same. Your progress when reading one note at a time will be very slow. Instead, try to look for groups of notes. For instance a dotted crotchet will often be paired with a quaver - think of this like a two syllable word. Beyond that, try to look further on so you see what’s ahead of you and can make sense of whole musical sentences. The faster the music moves, the further you’ll need to look ahead, but don’t forget these wise words from Winston Churchill!

“It is always wise to look ahead, but difficult to look further than you can see.”

Use the notation to help you

Music notation is designed to be helpful. Return to the music example above and look at the beaming. Beams are the horizontal lines which join together groups of shorter notes - quavers for instance. In most music, notes are beamed together in one beat groups. In this example the quavers and semiquavers are always connected together in dotted crotchet length chunks. This helps us see how the notes fit within the framework of the main beats in each bar. This helps you swiftly understand where the beats fall within the bar.

Be prepared for the notes you’ll inevitably forget

When faced with a key signature of multiple flats or sharps, there’ll always be one note you’re bound to forget - usually the last flat or sharp of the key signature. It must be something about the way our brains are wired, but almost every musician I know does this. If you’ve got three sharps, it’ll be the G sharp you’re likely to forget first, while in a key of four flats, you’re likely to overlook the D flats. If you know this you’re in a better position not to fall into the trap!

Focus on rhythm

Rhythm is what keeps music moving along so this should be your first point of focus when sight reading. Yes, aim to play the right notes too, but rhythm is key if you’re to get through the piece.

Don’t worry about perfection

A while ago I wrote a post about the tranny of perfection - the pressure we put on ourselves to be perfect musicians - a task we will always fail at. You can find it here, if you’d like to refresh your memory or read it for the first time. Sight reading will often cause us to fall into the same trap. It’s all too easy to feel you have to get everything perfect first time, but this a desire we’ll rarely fulfil. Instead, keep going, accept you’re going to make mistakes, but remember where they were so you can come back later to correct the errors.

Don’t be afraid to drop notes on the floor

I often jokingly tell ensembles they can drop notes on the floor and we’ll sweep them up later. Sometimes you just have to learn to edit the music on the spot in order to keep it flowing. I learnt this while studying for A level music. I was allocated a singer, whose lessons I was to accompany on the piano. Faced with a Vaughan Williams song with a key of five flats I knew I couldn’t play every note, so I focused on playing the bassline, along with some of the treble notes so my singer had enough accompaniment to carry him along. Second time round, I filled in some of the gaps, once I knew where the music was going.

Use your conductor

If you’re sight reading in an ensemble with a conductor, use them to help you get back on track. You probably won’t have time to eyeball them continuously. But if you’re able to keep their beat in your peripheral vision, you can then check that the first beat of your bars coincides with their downbeats.

Plan ahead and annotate your music

If you’re in an ensemble and you’re given your music while others are still being handed out, use that extra time wisely. Use the steps I listed earlier to prepare and don’t be afraid to pencil helpful notes in your music. Maybe glance through for accidentals and write in ones which reoccur so you don’t forget them first time.

Don’t panic!

Try to keep a clear head, concentrate solely on the task in hand and remember that nothing disastrous will happen if you do make a mistake.

Don’t forget to breathe!

While you’re focusing on getting round the notes, don’t forget to inhale from time to time. You need air to produce a good tone and the oxygen will help your brain to work better too.

You’ve got the basics, now to improve your skills…

Regardless of whether you’re a natural at sight reading, there are lots of things you can do to improve. Here are some practical things that’ll help you hone your skills.

Sight read often

Doing anything regularly will help you improve - conversely, if you only sight read occasionally it’s easy to forget the skills needed. Rummage through your own books of music for pieces you’ve never tried and set yourself the challenge of reading a few unfamiliar lines of music every day. There are graded sight reading books you can buy too and I’ve got some useful resources to share with you too. If you’re just starting out, something simple like a hymn book or a volume of easy folk songs will be useful. Think of this as musical speed dating. You have a short period with each piece of music, where you try to learn as much as possible about it, before moving on to your next date!

Be realistic about the music you choose

Don’t be tempted to select sight reading repertoire which is way beyond your capabilities. If you plan to work on a piece for several weeks or months it doesn’t matter if some of it is initially beyond you. Over time you’ll overcome the technical challenges and learn to play it. To hone your sight reading skills it’s better to choose something a little simpler so you have a sporting chance of maintaining a sense of flow. Over time you’ll be able to move on to more difficult music and stretch yourself further. This is where graded sight reading pieces can be useful, as you’ll be able to see the gradual progression in difficulty.

Practise scales and arpeggios

All music is made up from the patterns we find in scales and arpeggios. By learning to play these fluently, it helps us to recognise them when we see them in music. For grade exams you must memorise them, but I would argue that learning them from music is just as helpful for the purposes of sight reading. In the same way, there are certain combinations of letters which appear frequently in words - once we know this it becomes easier to understand and say words which use them - think of the ‘ough’ in rough, enough, thought and other words. Score Lines subscribers are welcome to download my scale and arpeggio sheets from the Members’ Area on my website. If you’re not a subscriber, why not sign up here for access to lots of exclusive subscriber goodies?

Explore different styles of music

Make yourself sight read music from different genres to widen your experience and learn to cope with unfamiliar patterns. One group I often conduct are great at sight reading early music, but really struggle with jazz based rhythms, purely because they’re less familiar with the style. The more you stretch yourself, the more adaptable you’ll become. Modern music often incorporates more complex rhythms than repertoire from the Renaissance or Baroque, stretching your rhythmic muscles more effectively.

Sight read with others

Playing on your own is enjoyable, but working with others makes you more accountable. Meet up with a friend to play duets, or find an ensemble you can join, where you’ll have to learn to keep going, come what may, when sight reading. If you don’t live near other recorder players, you can always play along with any of my Consort Videos to ensure you keep going!

Sight read on different recorders

If you play several sizes of recorder, make yourself sight read on all of them, perhaps picking a different instrument each day. Otherwise, if you always practise sight reading on the treble, there’s a danger you’ll be a demon reader on that recorder, but may struggle when faced with new music in descant fingering! If you struggle to find sight reading material for some sizes of recorder you’re very welcome to raid the my downloads page for more material.

Use your second chances wisely

When you play a piece for the second time, use that as an opportunity to get more detail and expression into your performance. Maybe pop in more of the dynamics or trills second time round. Be careful not to fall into the trap of overconfidence. On a second reading, subconsciously your brain is saying, “I know this piece a bit now - it’ll be easier this time”, so it’s easy to lose concentration. Conversely, many of the details you stored in short term memory the first time round will have left you because short term memories are stored for only a minute or so in our brains. The result is often a performance which is worse the second time! Don’t get overconfident, but instead concentrate even more to produce a better version second time round.

Looking for practice material?

As I mentioned earlier, there are plenty of sight reading books available to buy, many of them published by the various grade exam boards. There are some great resources available online too. These are the ones I’ve discovered while researching this post but if you know if others please do share them in the comments below.

Practice Sight Reading

A handy website where you can hone your rhythm reading skills at different levels. It’s free to use, but there is an monthly subscription option if you want more bells and whistles.

8 Notes

This site offers sight reading music for a plethora of instruments, including recorder. You can also browse for different styles of music, or even select pieces in particular keys if you want to polish up reading in sharps or flats. Some pieces have accompaniment, to keep you on the straight and narrow, while others are unaccompanied.

Sight Reading Factory

This is an automated site where you can customise the settings, specifying different parameters to help you practise. For instance, you could choose a piece for bass recorder, with a key of two sharps and incorporating triplets.

International Music Score Library Project

IMSLP is a wonderful resource, full of copyright-free music for every instrument you can think of. I often use it to identify fresh consort pieces or repertoire I could arrange for recorders. There’s no reason why you couldn’t use it for sight reading repertoire too though. Searching for ‘1 recorder’ brings up no fewer than 154 pages of suggestions - enough to keep you occupied for several lifetimes!

I hope my thoughts offer you some help with your sight reading. It’s a skill worth practising and polishing as the ability to read fresh music quickly and accurately is so important. If you’ve got your own tips and tricks which you’d like to share please do leave a comment below.

The Technique Zone - Make your recorder sing

Do you make your recorder sing? No, I don’t mean singing into your recorder, but instead I’m talking about playing a genuinely legato, singing line. This is one aspect of technique many people find difficult. But if you can master this, your playing will really stand out from the crowd.

Photo by Steven Erixon

If you think about it, the process of playing the recorder isn’t so different from the way we sing. The breathing technique you use is fundamentally the same, as are the muscles used to control the way breath leaves your lungs and enters the recorder. The big difference is of course the way the sound is produced. When singing, your vocal chords creating vibrations in the air column, while on the recorder this role is taken by the instrument’s labium. Similarly, in both recorder playing and singing we use our tongue and mouth to articulate words or notes clearly.

This parallel wasn’t lost of musicians of the Renaissance and Baroque. In his 1535 treatise, Opera Intitulata Fontegara, Sylvestro Ganassi says the following about playing the recorder:

“…just as a gifted painter can reproduce all the creations of nature by varying his colours, you can imitate the expression of the human voice on a wind or a stringed instrument. The painter reproduces the works of nature in varied colours because these colours exist in nature. Even so with the human voice which also varies the sound with more or less boldness according to what it wishes to express. And just as a painter imitates natural effects by using various colours, an instrument can imitate the expression of the human voice by varying the pressure of the breath and shading the tone by means of suitable fingering. In this matter I have had much experience and I have heard that it is possible with some players to perceive, as it were, words to their music; thus one may truly say that with this instrument only the form of the human body is absent, just as in a fine picture, only the breath is lacking. This should convince you that the aim of the recorder player is to imitate as closely as possible all the capabilities of the human voice.”

As Ganassi suggests, it takes much subtlety of articulation and fingering to perfectly imitate the infinite variety of the human voice, but for today we’re going to focus on creating a genuinely singing legato.

What do we mean by legato?

Type the word legato into an Italian-English dictionary and it’ll be translated as bound, connected or tied. For musical purposes, connected is perhaps the best of these, as the term is used to indicate a passage which should be played smoothly - that is connecting the notes to each other as closely as possible.

Is this the same as slurring?

This is a misconception I often encounter. When a musical phrase is printed with a long, curved line above or beneath it, the composer is asking you to articulate (tongue) the first note and then continue the rest of the phrase without tonguing, creating a silky smooth effect. Yes, the result is legato, but a genuinely smooth phrase doesn’t have to be slurred. It’s this non-slurred form of legato I’m talking about today as it’s the type you’ll need most often when playing the recorder. For this type of legato you’ll be tonguing every note, while still connecting them as closely as possible.

Do you sing?

Now, I know many recorder players also sing - for instance in a choir, maybe in church, or perhaps just while you’re in the bath. Maybe you class yourself purely as an instrumentalist, but I’m still going to ask you to sing. Don’t be afraid - I’m not expecting perfect operatic tones - this is just a means to an end. If you’re not a natural singer maybe find a quiet room where you can hum a tune without being self conscious - no one else need listen.

Sing a familiar tune to yourself, or maybe just sing a few notes of a scale. What do you notice about the way the notes are connected? Do you sing each note as individual, separate sounds, or do you naturally join them up? I’m willing to bet it’ll be the latter… When we sing it’s very natural to connect the notes together, because singing is one of those things we do from a young age, whether it’s nursery rhymes or humming along to your favourite song on the radio. For instance, listen to this beautiful rendition of Scarborough Fair by Rachel Hardy and notice how smoothly she shapes the lyrical melody.

Now think about your recorder playing. Do your musical lines have the same feeling of connection between the notes? If you were to record yourself playing, would you hear the same degree of smoothness when you listened back to it afterwards? If you’re not sure of the answer, why not do exactly that? If you have a smart phone it’ll almost certainly have a voice memo app you can use - no fancy equipment is needed. Pick a simple tune so you’re not overstretching your technique - if you’re stuck for ideas, click here for Jacob Van Eyck’s melody Daphne.

Now listen back to your recording. What did you notice? Were your notes beautifully connected, or did you notice some lumps, bumps and gaps? It’s easier to be dispassionate and critical when hearing your playing once removed, isn’t it? Now you’ve made a recording I suggest you save it - it’'ll be useful for comparison later.

Let me show you what I mean by a genuine, singing legato on the recorder, with a movement by Bach from my CD, Helen and Friends. Notice how I connect the notes to each other to create a sense of line.

How do I create a singing legato?

There are three crucial elements if you’re going to playing a genuinely legato melodic line - breath, tongue and fingers. Let’s take a look at the effect each one has on the end result.

Optimising your breath

When you listen to the Bach Adagio above, what makes the sound smooth and creamy? It’s the constant stream of air, isn’t it?

The most important thing needed for a perfect legato is continuity of breath. If the breath is constantly interrupted the result is a choppy, inconsistent sound. There are many reasons why this might happen and we’ll explore some of those in a moment.

For now though, the important thing is to keep blowing, right the way through each phrase - no matter whether you’re tonguing or slurring the notes. Let’s try this out straight away with a simple hymn tune, St Clement. I suggest you begin with a smallish recorder - these versions will work on descant, treble or tenor.

Click on the music to download a copy to print if you wish to

Click on the music to download a copy to print if you wish to

Begin by playing the melody entirely slurred - just tongue the first note of each phrase and then let your breath and fingers carry you through until the next breath mark. But look out for the one repeated note where you will need to tongue once more.

Here’s my version:

Don’t worry if your version doesn’t sound quite this smooth and creamy yet - we’ll fix that in a moment. The important thing is to keep the air flowing at all times, even if things get a little bumpy at first. Slurring forces you to keep the air flowing all the time - this should also be your aim when you start tonguing again.

Another crucial consideration when playing a singing line is the speed of breath for any given note. If you haven’t already read my post about developing your tone, now would be a good time to do so as I covered all the basics to get you started. Of course, if you have read it there’s no reason why you shouldn’t return for a refresher! You can find my post on tone here - it’ll open in a new tab or window on your browser so you won’t lose your place here.

It’s important to remember your recorder requires a different speed of breath depending on where you’re playing on the instrument - bottom notes need slower, gentle breath, while high notes require faster breath to create the optimum sound. This is something you need to consider while playing any melodic line but it’ll be especially noticeable in a simple tune like St Clement. Listen to my recording above again and notice how I subtly increase the speed of breath for the higher notes than the low ones, to ensure I’m always making the best possible tone. Tailoring the speed of your breath for the range you’re playing in is an important part in creating a smooth, singing line.

To practise this breath control further it’s important to use easy melodies at first - try and do this with something fast and whizzy and you’ll be distracted by your fingers. Hymn tunes or slow folk melodies are perfect for this, but you could just as easily use simple, slow scales and arpeggios for the same purpose. If you’re a Score Lines subscriber you’ll find some handy scale sheets to download over in your Members’ Area.

Don’t let your tongue interrupt the flow

As you get used to this continuity of air flow while slurring, the next step is to introduce some articulation.

We often talk about using particular letters to articulate notes - such as D or T. I would take this a step further and add an ‘ooo’ sound after your chosen letter - ‘doooo’ or ‘toooo’. This gives a greater sense of the air flow and will help you get that longer, smoother feel.

Which letter should I use?

Say the word ‘doo’ to yourself and note the way your tongue moves within your mouth. The tip of your tongue lifts and makes contact, briefly, with the hard palate - that crinkly feeling ridge just behind your top front teeth. It’s this contact which creates the clean start to each note. If you now say ‘too’, notice how it has a slightly stronger effect. Both are valid for recorder playing, but for a genuine legato you need to minimise the strength of the articulation as much as possible, so I would use ‘doo’ for best results.

Minimise interruptions to the flow of air

Now experiment with this articulation (without a recorder for now), saying ‘doo’ in different ways - with a firm D and then with a softer, less explosive one. It’s this latter, gentler ‘doo’ you need to hone if you’re to play a really smooth, singing line. Try shaping your tongue in different ways and notice how the the articulation is softer and smoother when your tongue remains in contact with the hard palate for as little time as possible. It’s important to remember that all the time your tongue remains in contact behind your teeth it’s stopping the air flowing into your recorder, creating gaps in the sound.

It’s also worth experimenting with a ‘looo’ articulation. If you compare ‘doo’ and ‘loo’ you’ll notice you’re fundamentally making the same tongue movement, but the contact with your hard palate is even gentler for ‘loo’. If you find your ‘doo’ tonguing is still a little too explosive, try using ‘loo’ instead.

Now try the same tongue strokes while playing slow, repeated notes on a recorder. Focus on keeping the breath flowing at all times and ensure your tongue interrupts this stream of air as little as possible. Don’t forget to think about the quality of your tone too - it’s easy to forget this while you’re concentrating on your tongue!

If you can produce a line of beautifully connected. steady repeated notes (speed is not required yet) you’re well on the way to being able to play a singing legato line. To give you an aural example, here’s a simple recording of me playing repeated notes, each time the pitch changes I alter my tonguing, first from ‘too’ to ‘doo’ and then to ‘loo’. Notice how the gaps between the notes become smaller and the connection between them increases.

Keeping your fingers neat

One of the habits I frequently notice among recorder players is a propensity for their legato playing to suffer as soon as the notes get harder. As soon as we hit a fast passage, or one that’s peppered with accidentals, we naturally concentrate more on what our fingers are doing. It’s a simple matter of multitasking - there are only so many things we can think about simultaneously. What’s the result? A choppy sound, which has little sense of line or continuity. Listen to this example, an extract from one of Handel’s recorder sonatas, first played as I often initially hear it in recorder lessons, and secondly with more attention focused on maintaining a smooth articulation.

Extract from Handel Sonata in B flat

Now, of course, I was hamming that up a little for the microphone, but it’s still a fairly true representation of what I often hear! The scales are quite straightforward to play, but once the music begins to leap through arpeggios in line two, more finger movements are required (including a tricky cross fingering for E flat) and the brain naturally focuses on those more than their smoothness. That particular extract was from an Allegro, but the same problem can occur in slow moving music.

Don’t neglect the quality of your finger movements

Now go back to smoothly play the hymn tune St Clement again, but this time think about the way you’re moving your fingers.

With a slow piece like this, would you expect your fingers to move quickly or slowly between notes? If your instinctive answer is ‘slowly’ I’m afraid you’re wrong - your fingers must always move quickly, regardless of the tempo. I often pose this question to players I coach and there are always a number who fall into the trap I’ve laid!

Think for a moment about how much space there is between the notes when you’re playing really smoothly… There’s almost no space at all, is there? This means if you move your fingers slowly you’ll hear all sorts of blips and slurps between the notes as the change between fingerings takes too long. If instead you focus on making really quick, neat finger movements you’ll find your fingering is more rhythmic and it’ll fit neatly with your legato tonguing. For instance, listen to this second recording of St Clement, this time played with every note tongued as smoothly as possible. You’ll hear the transitions between notes are clean and the overall effect is almost as silky smooth as the slurred version you heard earlier.

The challenges of playing an eighteenth century instrument

The design of the recorder has more or less been frozen in time since the 18th century. Unlike the flute or oboe, our instrument hasn’t gained extra keys to simplify the fingering (aside from those added to ease long stretches on larger recorders). Because of this, we have to deal with more complex finger patterns for some notes - think of the awkward cross fingering we use for E flat (treble recorder) or B flat (descant/tenor). These forked or cross fingerings mean your thirds fingers (which are naturally weaker than the others) often have to work independently of the others. This is why music with lots of sharps or flats is harder to play on the recorder.

So often I hear awkward passages (be they fast or in difficult keys) being played less smoothly than sections where the fingerings are easy. I guess it’s an instinctive piece of compensation by our brains. Somewhere in our subconscious we know that if we create more space between each note (effectively playing staccato) that gives our fingers more time to get to that difficult fingering!

I don’t have a magic bullet for this problem, but if you find yourself falling into this trap don’t be afraid to slow the music down and tidy up your fingering. Once you’re able to negotiate difficult fingerings neatly and with ease, that then frees up more of your brain to think about tonguing smoothly too. While playing smoothly in slow music is simpler (you have more thinking time), if you’re aware of this potential pitfall you’re in a much stronger position to avoid it.

Developing your sense of line

So what can you do to improve your legato tonguing and create the mellifluous singing line we’re after? Here are my top tips…

Practise regularly - The best way to turn good technique into something you do habitually is to do it as often as possible! If you’re short of practice time, at least make sure you spend a few minutes every day playing really smoothly. Little and often will be much more effective than a big splurge of practice once a week.

Start with something simple - Don’t try and work on your legato lines with a Vivaldi concerto - you’ll get distracted by all the whizzy notes! Instead, pick a simple, slow melody or an easy scale and use that to really focus on the quality of your legato.

Build up gradually - Once you can habitually play your simple melody with a beautiful singing line you can then move on to something more challenging. Do it gradually, perhaps picking something a little quicker, or a piece with more complex finger patterns. Don’t push yourself too far too soon and don’t be afraid to take a step back to something simpler for a refresh from time to time.

Record your playing - Use the voice memo app on your phone, or another recording device, to record yourself from time to time. Maybe pick a simple melody and record yourself playing it once a week. After a few weeks go back and compare the recordings - if you’ve been listening critically to yourself and working diligently you’ll hear a difference.

Listen to other recorder players - Go onto the internet or your favourite music streaming service and search for professional performers playing. Really listen to their performances and analyse what they’re doing. As Oscar Wilde once said, “Imitation is the sincerest form of flattery.” You don’t need to imitate every last detail you hear in another recorder player’s performance, but you’ll learn a lot by listening critically to those who’ve spent a lifetime honing their skills to share with the rest of us. To get you started, here are a few recordings where the performers achieve a deliciously legato singing line, bringing their recorder as close to the human voice as Ganassi said we should.

~ ~ ~

Marion Verbruggen playing Amarilli mia bella by Jacob van Eyck

Piers Adams performing Dido’s Lament by Henry Purcell from Bach Side of the Moon.

The Flautadors playing Pavan No.13 by Anthony Holborne

Dan Laurin performing the second movement of York Bowen’s Sonatina for recorder and piano

Erik Bosgraaf performing the Sarabande from Bach’s Partita BWV1013

If you have tips of your own please do leave a comment below and share them with us. Maybe your teacher gave you a great way to play smoothly, or perhaps there’s a gorgeous recording you’ve discovered which you love to try and emulate when playing smoothly. Let’s share our ideas and work on this together!

How do you hemiola?

Most recorder players feel at home playing Baroque music. After all, the period between around 1600 and 1750 was the heyday of our instrument, with composers like Handel, Bach and Telemann producing exquisite solo and chamber music for the recorder. However, there’s one rhythmic feature of Baroque music which often creates confusion and concern among recorder players - the hemiola. As we shall see, the hemiola wasn’t restricted to the Baroque period and can be found in repertoire as disparate as Susato and Brahms.

When conducting recorder ensembles, I often ask if everyone knows what a hemiola is when we encounter one. Usually, I see a handful of confident nods around the room, but these are invariably outnumbered by people who either look at me blankly or else suddenly find the floor immensely interesting! My aim today is to help lift the mists of rhythmic confusion, to assist you identifying and playing them with more confidence.

What is a hemiola?

Put simply, it’s a temporary change to the music’s regular rhythmic pattern, changing groups of three beats into groups of two. It’s always simplest to explain such concepts with musical examples so you can actually see them in practice. Take a look at this extract from Lully’s Bourgeois Gentilhomme:

The time signature gives us three beats in each bar. The first beat of the bar is the strongest, so the hierarchy of beats in bar one is strong-weak-weak. The same applies to bar 2. Now look at bars 3 and 4 and see how the rhythm changes. Instead of three crotchet beats we have three minim beats spread over two bars. With a note held across the barline, there’s no way to emphasise the first beat of bar 4, so instead stronger pulses occur every two beats, rather than every three. This is a hemiola.

This particular example is about as simple as it gets with hemiolas - all five voices play the same rhythm so the effect is inescapable. Unfortunately, not all hemiolas are so obvious. If you glance at bars 6 and 7 you’ll see a very similar rhythm, but here the highest voice deviates slightly from the pattern. The overall effect is still a hemiola but slightly less clear cut.

If you find it easier to understand this concept visually I recommend watching this video, created by the Orchestra of the Age of Enlightenment, which uses different examples to help explain the hemiola further - including a juggler! The video also includes the Lully example I showed above, among others.

Why do we have hemiolas?

There are several reasons why a composer might wish to include a hemiola in his or her music - let’s look at them..

To add rhythmic interest

Shifting between groups of two and three beats brings an extra layer of variety and energy to the music. Brahms does this a lot in his music, sometimes bringing hemiola shapes into different parts independently. Recorder players don’t often get to play Brahms, but the same things happens in earlier music too. In The Fairie-round Anthony Holborne shifts endlessly between duple (2) and triple (3) time rhythms. Sometimes the parts shift between meters simultaneously, but often they work independently of each other. sometimes simultaneously. I’ve altered the colour of the notes in this extract to show the triple time rhythms in red, while the duple time rhythms are blue. Click on the image to see it enlarged. If you’ve ever tried to play the Fairie-round you’ll understand why it can be so tricky to put together!

To speed up the musical movement

When you create a hemiola you shift from having a strong pulse every three beats to one every two beats - this gives a sense of the pulse increasing in speed. I’ve added a drum line to the Lully example shown above, placing a drum beat on the stronger pulses. Notice how the speed of the pulse increases when the beat occurs every two beats rather than every three beats.

An aural guide to the music’s phrasing

This is perhaps the most important function for a hemiola, especially in Renaissance and Baroque music. While modern music can be hugely complex, early music frequently contains more consistent and predictable harmonic and rhythmic patterns. That’s not to say it can’t be surprising, but there are melodic and rhythmic features which crop up regularly - for instance trills at cadences in Baroque music.

The hemiola is one such musical feature and composers use it to flag up to the listener that we’re approaching the end of a phrase. Of course, it’s unlikely that you’ll sit there thinking to yourself, “Oh, there’s a hemiola - that must mean it’s the end of a phrase!”. But if you listen to music from this period often enough you’ll subconsciously sense the movement of the rhythm and harmony, feeling a sense of arrival as the music reaches a cadence.

The biggest clue is the rate of change in the harmonies. Very often there will be just one or two chords or harmonies in each bar. At the hemiola this alters, as the harmonies change more swiftly. For instance, listen to this short movement by Gottfried Keller and notice how the rhythm and harmony shifts up a gear just before the cadences. If you’re not sure where the cadences are, listen out for the trills which also occur then. If you’d like to follow the music as you’re listening click here.

Where do hemiolas happen?

Generally hemiolas occur in triple time music - that’s music which has three beats in each bar, say 3/4, 3/2 or 3/8. Let’s look at a few examples.

The first comes from Handel’s Music for the Royal Fireworks - a short extract from the Minuets. The music is in 3/4 time but two bars before the end of the phrase (look out for trills as these often occur at cadence points too) the harmonies change from mostly being one chord per bar to three chords spread over two bars - shown by the boxes.

If you’d like to try this example for yourself you can play among with my consort video of the minuet here.

Minuet from Handel’s Music for the Royal Fireworks - click on the image to see it larger

Now let’s take a look at a hemiola in minim beats - this time taken from Handel’s Recorder Sonata in D minor. If you look at the boxes, you’l notice the first first two beats (box 1) include notes which are predominantly from one chord - A major (A, C sharp and E). The second box contains two different chords, but the final one is once again made up almost entirely of A major.

Handel recorder Sonata in D minor, 2nd movement

As a further example, here’s a short snippet from another of Handel’s recorder sonatas - this time in C major. The time signature is 3/8 - three quaver beats (or one dotted crotchet beat) per bar. In bars 46 and 47 he changes this to have rhythmic groups of two quaver beats. The hemiola is clearest in the recorder part, where the silence on beat one of bar 47 means the emphasis inevitably shifts to the dotted quaver note on the second beat of that bar. This particular movement is littered with hemiolas just like this, introducing a delightful shift from the one in a bar feel elsewhere in the movement. You can listen to the whole movement below.

Handel Recorder Sonata in C major, 2nd movement

Of course, there’s no such thing as a rule that’s never broken, so occasionally you’ll find hemiolas in unexpected time signatures. In La Paix Handel writes in 12/8 time, but still manages to squeeze a hemiola in at the cadences! The music isn’t in triple time, but as the dotted crotchet beats each contain three quavers Handel can group those quavers in twos rather than threes, thus creating a hemiola. Take a look at the top three parts where I’ve added the boxes and you’ll once again see the beats grouped in twos - predominantly either crotchets or as pairs of quavers.

La Paix from Handel’s Music for the Royal Fireworks

Finding the hemiola in its natural habitat

Let’s take a look at the most likely locations for hemiolas…

Cadence points

In Renaissance and Baroque music hemiolas almost always occur immediately before a cadence. These are the points where the music comes to rest momentarily, giving a sense of arrival. If you’re not sure what a cadence is, think of them as the musical equivalent of punctuation in written text. When reading text aloud, the commas and full stops tell you where to take a moment to allow a point to sink in, allowing both you and your listeners a moment to breathe. A cadence has the same purpose, bringing a sense of pause or arrival in the music. Play through any of the examples I’ve shared so far today and you’ll feel this sense of arrival on the note or chord immediately following the hemiola.

When you learn a new piece of music, listen out for these moments of repose as they will guide your phrasing. If the music is in triple time (3/8, 3/4 or 3/2) or in 6/8 you may well find a hemiola in the bar or two immediately preceding these cadence points.

Take a look at this section from Andrew Parcham’s Solo in G, where I’ve marked two hemiolas. Both come at cadence points and if you try playing the top line you’ll no doubt feel that moment of arrival on the note immediately following the hemiola. The composer would almost certainly have expected the performer to add a trill to the final dotted crotchet of each hemiola too - as you can hear in the recording below. The Allegro begins 2 minutes and 27 seconds into the video.

Andrew Parcham Solo in G

Look for trills in Baroque music

As I’ve already mentioned, cadence points are often decorated with trills in Baroque music. These aren’t always marked in the music because composers generally assumed the musicians would be familiar enough with the musical style to know where they should be added. But some did take the trouble to notate them and you’ll often find places where modern editors suggest adding cadential trills. These can be an additional way for you to spot where a hemiola may be lurking.

Look at the whole score

Perhaps the most important piece of advice I can give is to look at the whole score of the music, not just your individual part. Sometimes the hemiolas will be clear as day in your line, but, as we’ve seen in some of the examples I’ve shared, it’s often easier to spot the hemiola when looking at several parts together.

For instance, look at this extract from a Ronde by Tielman Susato. If you’re playing the top line, reading from a single part, you’d be forgiven for missing the hemiola entirely because both bars look like standard 3/2 rhythms. Cast your eye down through the score though and the hemiola becomes much clearer, with a two beat note at either end. Here the top line is simply providing rhythmic contrast, but the overall effect is definitely a hemiola.

Susato Ronde

Look for the rhythmic clues

Very often a hemiola’s effect is amplified by the use of longer notes, which have more weight or aural mass, as I like to call it. Look through any of the examples I’ve shared here and you’ll see time and again, how the composer fills one or two of the hemiola’s three parts with a longer note. This length and weight of these notes makes that section of the hemiola feel more significant, emphasising the fact that he or she is moving the musical stresses away from their usual position on the first beat of the bar.

For example, look at the last few bars of Telemann’s Concerto in C below - at the hemiola you’ll see I’ve circled the dotted crotchets in red. These notes will naturally draw the ear because they’re longer than the other note values within the hemiola. This brings the hemiola effect out effectively, especially if the quavers are kept detached and light.

Telemann Recorder Concerto in C, 4th movement

Look for consistency of rhythm through the texture.

As we’ve already seen, the hemiola rhythm doesn’t always appear in every voice, but often there will be some unanimity. Take a look at this Galliard by Anthony Holborne and you can clearly see a consistency of rhythm between the five voices. Unlike the Lully we looked at first, the parts aren’t entirely unanimous in their rhythm, but in both hemiolas several voices simultaneously have the same rhythm. Looking at the score, it becomes clear there’s a move away from the usual 1 2 3 - 1 2 3 rhythm to a hemiola pattern.

How do I play a hemiola?

Once you’ve identified your hemiola it’s very tempting to emphasise the start of all three sections to hammer the point home. Undoubtedly this will make your hemiola stand out, but it’ll likely lack subtlety!

A better approach is to think in terms of only emphasising one or two sections of the hemiola, which will result in a more subtle, musical effect. For instance, there are two hemiolas in this section of Purcell’s Chaconne from The Gordion Knot Untied. Both begin and end with dotted rhythms, which will naturally attract the most musical weight because of their longer length.

Ordinarily, the first beat of each bar would be the strongest, but here the aural mass of the dotted crotchets moves the emphasis onto the second beat of bars 52 and 59. Now you could also put some added weight onto the last beat of bars 51 and 58 to bring out the middle section of the hemiola. However, the result would be rather heavy and a better approach is to make the middle section of the hemiola light and less important. In this case I’d simply make the crotchets which fall within the second box of each hemiola short and light, creating a sense of lift and bounce. You can hear me putting this approach in practice in my consort video of this piece here.

Let’s take a look at another example, this time from Handel’s Recorder Sonata in B flat.

If you listen to this recording by David Antich you’ll hear the ensemble allow the longer notes to have some weight, but the cellist keeps the crotchets in the bassline light and separated, so as to minimise their importance and help highlight the rhythmic shift of the hemiola.

Looking beyond early music

As I said earlier, hemiolas aren’t restricted to the music of the Renaissance and Baroque - later composers used then too. One of the most famous appears in Leonard Bernsteins’s score for West Side Story and you’ll almost certainly be familiar with the shifting rhthms in America. But had you ever thought of it as a hemiola? You will now! Take a listen - the famous melody line begins around one minute and fifteens seconds into the video below.

Another example occurs in the opening bars of the Concierto de Aranjuez by Joaquin Rodrigo. The solo guitarist opens the whole work with the rhythmic pattern shown below - a clear hemiola in 6/8 time.

As I said at the beginning, Brahms wrote hemiolas too and you’ll find them dotted about endlessly in his music. Very often he chooses to write hemiolas independently in different voices but in this example, from his Intermezzo No.1 for piano, he shows them very clearly together. Normally in 6/8 time the quavers would be grouped in threes (as they are at the beginning of the extract) but on the second system here he writes a series of crotchets - notes worth two quavers - to create a series of hemiolas.

Johannes Brahms Intermezzo No.1 for piano

Are the hemiola mists clearing?

I hope my explanations and all these musical examples have helped you to understand the hemiola better. Don’t be afraid of them, but just be aware of their existence when you meet pieces where the note patterns are grouped in threes. Take every opportunity to consult the score, as you’re more likely to see them there, and don’t hesitate to experiment with your phrasing and articulation in bars you think may be hemiolas. These fascinating rhythmic patterns don’t bite and they can bring more variety, light and shade into your performances.

Finally, if you have a trick for spotting or dealing with hemiolas which I haven’t mentioned please do leave a comment below so we can share our ideas and musical knowledge.

Behind the scenes with the Score Lines videos

One of the questions I’m asked most about the consort videos I’ve been making for the last two years is, “How do you make them?”, closely followed by, “It must take you hours!”

There was a time during the first Covid lockdown that professional musicians everywhere seemed to be creating multitrack videos, often as a way to remind people we were still out there, even if we couldn’t play to a live audience any more. I didn’t jump on the bandwagon immediately as I was enjoying the opportunity to have some genuine down time at last. I soon became aware how much the people with whom I normally work (amateur musicians like yourself) were missing being able to play in ensembles. I too was missing my musical interactions with others and it struck me that maybe there was scope for me to create some resources to help others.

Recording in action

First steps

While I’ll happily admit I’m a bit of a geek, I don’t have any real experience of video - stills photography is much more my cup of tea. I didn’t want to spend hours editing and grading video content from a proper camera so I did some research about simple ways to make a multitrack video. I quickly hit upon an app called Acapella which can be downloaded to your smartphone. I found some helpful videos on YouTube by flautist Gina Luciani explaining how it works, so I downloaded the trial version and had a play. Incidentally, if you fancy trying this yourself, I believe the iOS version (intended for iPhones) is more fully featured than the Android version. Of course, there may be alternatives out there which work better on Android too.

Shortly before the pandemic I’d bought myself a pair of good quality wireless earbuds, to listen to music on the move, so I figured I’d use them to record my videos. Imagine my disappointment when I tried Acapella and none of the tracks quite knitted together - I was ready to throw the whole kit through the window! Consulting friends who are more technically minded than I me, I discovered there is a slight delay in the way sound plays through a Bluetooth wireless device - sufficient to cause my problems. Instead I went back to my old wired earphones and things worked much better.

One of my first projects was a recording of Holborne’s The Fairie Round - a classic of the Renaissance consort repertoire, with lots of fun cross rhythms. This worked moderately well and I shared the result (which you can see below) with friends on social media. This made me think perhaps there might be some mileage in exploring further…

Next step - figuring out what might be helpful to others

By this stage (May 2020) there were other musicians already creating play along videos for recorder players. Looking at these more closely, they all comprised just the music, with little or no indication of the speed or help to get started. I know from long experience that many players find the gestures of a conductor helpful so I pondered if it might be possible to include this in any resources I produced.

I decided to start with something simple - a trio of Bach Chorales. I’ll explain the process I now use to record in a moment, but for these I began by playing the music and then added a conducting track. In between each chorale I offered a few words of advice to camera about tempo and how you might tackle them. I then popped them on some of the recorder groups on Facebook, along with the music, and asked if anyone might find them useful. The response was very positive - much to my relief. The finished product was pretty rough and ready, but I could see there might be a demand for such offerings if I could come up with some more.

My next project was a Chaconne from The Gordion Knot Untied by Purcell - a piece I’ve conducted with many groups over the years. For this I began the pattern I’ve maintained ever since, with a recording of the music, plus a separate ‘Hints and Tips’ video. I figured the chat between movements would quickly become irritating for anyone who played along with any piece regularly, so it made sense to separate them. Whether everyone watches both videos is something I can’t track, but I know many people find my thoughts helpful and I do my best to offer some useful advice with each consort.

Gradual additions to the technology

When I began recording my videos I started with the Acapella app on my phone, mounted on the tripod I use for my photography, along with the pair of basic wired earphones which came with my iPhone. Since then I’ve made a few additions to my kit, with a Rode VideoMicro microphone (plus an adapter which allows me to connect the mic and a pair of earphones to my phone). This addition offers much better quality sound. It can also be adjusted to cope with a greater dynamic and tonal range. The recorder may not be an especially loud instrument, but its pure tone (especially the higher members of the family) means it's easy to overload the microphone. I now know to have the sound level adjusted to about one third of the maximum to avoid any painful high notes.

A close up of my phone setup, with microphone, adapter and cables. You don’t need anything other than a basic pair of wired earphones to get started if you fancy trying this yourself!

Another addition was a Rotolight NEO 2 video light which I bought second hand. I record my videos in from of our dining room window (much to the amusement of our postman as he passes the window), which provides good illumination from one side, while the left side of my face faces the darker end of the room. Using the video light provides fill light to lift the shadows and means I can record on dull winter days without it looking too gloomy.

My Rotolight NEO on a simple light stand to add illumincation

Figuring out the process

Learning how to get the best from the Acapella app has been a process of trial and error. Gina Luciani’s videos got me started, but from there I just had to jump in and play to get the results I desired. It’s taken lots of experimentation to find out what works best for me, the acoustic of the place I record and the sound of the recorder. Here’s a brief explanation of my process in case you fancy having a go yourself…

Setting up the Acapella app.

Once you’ve chosen your piece you need to select a layout and Acapella offers an impressive range of options. I general use a square layout for the multitrack videos, while for my Hints and Tips videos I go for a portrait format frame. As you can see here there are many options, but for my purposes I always pick a large frame for the conducting track (so you can see my gestures better) and smaller windows for the instrumental parts.

The next step is to pick the length of video. The trial version of Acapella limits you to 30 seconds (long enough to get a taste of whether you might wish to pursue this further) but the paid version (around £42 for access to all the bells and whistles for a year but you can pay monthly if you want to give it a try before committing) can accommodate videos of up to ten minutes - plenty long enough for my purposes. You can set a specific length of time (if you know exactly how long your piece of music is) but I tend to choose ten minutes and then stop the recording when I’ve finished playing.

Next you need to set up the metronome. No matter how rhythmic we think we are, it’s almost impossible to adhere to a perfectly consistent beat unaided. The ability to set a metronome pulse (which plays through my earphones as I record) is invaluable, although there are times when I curse it. More about that later…

The app offers you a choice of time signatures and metronome speeds from 60 to 180. On the rare occasions I need something slower (say 50) I’ll just set a speed of 100 and use it as a subdivided beat. When I’m recording the hints and tips videos I simply turn off the ‘play tempo’ option as I don’t need a pulse to distract me when I’m talking to the camera!

The final set up screen relates to the microphone. This is relevant whether you’re using the microphone built into your earphones or an external mic like mine. Even with a relatively soft instrument like the recorder, setting the microphone level to maximum will result in all sorts of distortion - as you may have heard in some of my early efforts. As you can see from this screenshot, I set mine at no more than one third, although I might increase this a little if I’m recording a piece solely on low recorders. To determine the right level, I just play a range of pitches into the microphone and watch the green on screen meter to check they don’t exceed what the microphone can cope with.

The settings lower down the screen relate to the monitor. This is the sound that plays through your earphones - both the live sound that you’re recording and the tracks you’ve already recorded. This is important so you can hear the tuning between the various voices.

Now it’s time to record!

With all the set up done, the fun bit begins. I tend to start with the bass line and work upwards, but it’s worth trying different approaches - you may find it easier to begin with the descant and work downwards. I’ll talk a little more about the challenges and how I deal with them later.

Acapella gives a countdown on screen to tell you when the microphone becomes live. Then it’s simply a case of playing in time with the metronome beat that’s audible through the earphones. If you find metronomes challenging, my top tip here is never to tap your foot at the same time - you’ll always follow your foot as it’s part of you! When you’ve finished, the app asks if you want to have another go, or if you’re happy. Pressing continue offers you a chance to listen to what you’ve just recorded. If you like what you hear, selecting the green tick triggers the app to render the track you’ve laid down, saving it and the allowing you to record the next one. From there it’s a case of rinse and repeat until you’ve recorded all the voices.

Tweaking the sound settings

The final step is to adjust the sound of the various tracks before you save your finished video. There’s a huge array of options, but I keep it pretty simple. My dining room has a relatively hard acoustic, so I add some reverb to soften the edges and a little hint of echo. A carpeted room would absorb the sound even more so might need a little more assistance to add a little bloom to the end result. The engineer who recorded my CD described this as adding ‘fairy dust’ - that magic quality which turns the dry acoustic of one’s living room into something more flattering! I’ve experimented with using even more reverb but in my experience that just feels too extravagant.

Export and share with your audience

Finally, it’s time to export the completed video and share it with the world! Once you’ve named the video you save it to your Acapella account (I tend to save mine as private files rather than public) and then you have an option to save it in other ways too. I export a copy to my iPhone photos, but you can also share it by email, WhatsApp or on social media from here. One of the options is to select Full HD output (the best quality Acapella offers) or 720P. While it would be wonderful to go for the quality of HD, I generally opt for 720P as the file sizes are much smaller for my subscribers to download them later.

To play or conduct first?

So far I’ve talked about the technical process of recording my videos, but I’ve faced practical decisions along the way too. The first of these is whether to record the conducting or playing tracks first. With a metronome to keep me in time one could argue that the playing could come first. However, doing this presents problems if there’s a tempo change in the music. Because of this I tend to lay down the conducting track first. I spend a few seconds showing my intended speed before giving a bar for nothing and working my way through the piece, conducting at the speed of the metronome best in my ear. If there’s a rallentando at the end I then have to ignore the click of the metronome and indicate the degree of slow down I’m after. This takes a good degree of willpower, but I’ve become quite good at listening selectively when I need to!

Of course one of the most challenging aspects of beginning with the conducting track is the fact that I’m doing so in complete silence. Normally I would respond to the players I’m working with, but here I have to know the score well and give the gestures I would expect to offer to a group of live musicians. From time to time our postman will walk past the window as I’m doing this and I’m sure he must think I’m doing some obscure form of tai chi!

A matter of intonation

The other big challenge when recording multitrack videos is that of intonation. Playing with other musicians in real time is always a game of give and take. You listen to each other and make micro adjustments to the pitch of notes, to make the tuning sweet and true. With multitrack recording this isn’t possible. Once the first track is laid down it’s an immovable object which doesn’t respond to later inputs. This is one of the reasons I begin with the bass line as I can then layer up the other parts on top to fit with it.

So how does one make sure the harmonies are true? This is where it helps to know a little about the way chords work. You may have heard conductors and teachers talking about adjusting the individual notes in chords to obtain pure intonation. This usually entails making the 5th (the G in a C major chord, for instance) quite bright, while the 3rd will need to be altered depending on whether you’re playing a major or minor chord.

A major third (E in our C major chord) will sound sweetest when played a touch flatter, while a minor third (E flat in a chord of C minor) will want to be fractionally sharper. Next time you play with friends try experimenting with this by playing a major chord and varying the pitch of the third - a little higher, a little lower. A really bright major third gives the chord a sour, grating quality. In contrast, lowering the third a little (you can adjust your breath pressure or shade a finger over one of the holes) will make the end result much sweeter and the third almost seems to melt into the chord.

This is the very process I go through as I record each video. For this reason I always record from the score if I can, as it enables me to identify the position of each note within the harmony and adjust its pitch accordingly. This takes a fair degree of mental gymnastics, but experience of conducting from scores and playing basso continuo from figured bass has taught me many of the patterns to expect. Of course, months of making these videos has also helped me learn the foibles of my recorders intimately. I now know where to ‘place’ certain notes using breath pressure or minor adjustments to fingerings to hit the mark. There are inevitably places where I don’t get things right for every single note but I’ve never claimed to achieve recorder consort perfection!

Getting it right first time

When we listen to professionally made recordings we naturally assume the performances we’re hearing are absolutely perfect. The reality is that most recordings (except perhaps ones made in live concerts) require some editing to remove small glitches and errors. In a post last December I talked about the way we expect perfection of ourselves – an expectation which is simply unachievable.

Professional musicians aim for perfection but we’re as human as you and that’s why we have recording engineers who can record snippets to patch into the finished performance to create the illusion of perfection. Sadly I don’t have a tame recording engineer to hand, or the skills to do this myself, and the Acapella app doesn’t offer this option in any case. This means I have to get as close to perfection as I can and accept that every video I produce will inevitably contain some imperfections.

As I record each track I am continually analysing any errors I make, deciding whether they’re absolutely unforgiveable (in which case I stop and begin again) or whether they’re small enough to be overlooked. When I was at music college my recorder teacher would admonish me for being ‘too neat and tidy’. He was looking for more spontaneity and freedom in my performances. I like to think I’ve loosened up over the years, but that tendency towards tidiness has proved to be a boon when recording videos! That said, there are inevitably times when I make stupid errors and have to record a track multiple times. If you imagine you’re the only person who slips into the wrong fingerings or makes daft errors don’t give yourself too hard a time – I do it too. I recall one contrabass part which I recorded five or six times because my brain insisted on sending me into great bass fingering!

I know from experience of recording CDs that if something doesn’t come good in the first couple of takes it will often get worse before it gets better. Think of those old TV programmes showing outtakes of famous actors fluffing their lines. They’re funny because generally they make ever more mistakes with each further attempt, so take 17 is usually much worse than take 2! Musicians are no different. Sometimes you just have to walk away, go and have a cuppa, and try again later. The same goes for my Hints and Tips videos where I sometimes find myself incapable of stringing together a coherent sentence. Fortunately, I don’t save the outtakes, so you’ll never get to enjoy my ineptitude!

Now you can have a go!

So there you have a glimpse behind the scenes of my consort videos. If you fancy having a go yourself I would encourage you to go ahead and try. You don’t need expensive equipment – a smartphone and the wired earphones that were supplied with it are enough to get you started. Yes, it can be frustrating when you make daft mistakes, but that’s all part of the learning process. Even if you never share the results with anyone else, I can guarantee you’ll achieve a greater understanding of your musical strengths and weaknesses and it’s fun too. I know some of you have already tried this and I was delighted to see some of my own videos being used as a starting point for further collaboration by my subscribers. I’d love to hear how you get on if you choose to jump in and have a go – do leave a comment below or drop me an email to tell me about your experiences or with any quesitons.