behind the scenes

The Practice Diaries

I’ve written about practising before, but always in a theoretical, didactic way - introducing you to the principles of practising. While conducting a recent orchestra rehearsal we encountered a passage containing some fast moving notes for most of the players. Naturally I encouraged them to practise these bars before our next rehearsal, but I also talked more specifically about how to practise them.

This topic has been uppermost in my mind of late as I’m working towards a concert myself. In one of the pieces we’re going to perform I have a couple of passages which stretch my technique and need some serious tidying before the concert. I’ve been working on this section each day and it occurred to me that you might find it interesting and useful to actually see and hear first hand what I do when I practise. So here we have The Practice Diaries - what may become the first in an occasional series. Using short video clips (most are 2-3 minutes long) I’ll take you along on the journey with me, explaining the process and hopefully you’ll see some progress along the way. The first few videos all come from one practice session, bringing you up to speed on the music I’m learning, plus some insights into what I’ve done so far.

Let’s jump into this warts and all exploration of my practice techniques. It won’t necessarily be pretty, but hopefully seeing my personal failings and successes may inspire you to make some of your own!

What are we practising?

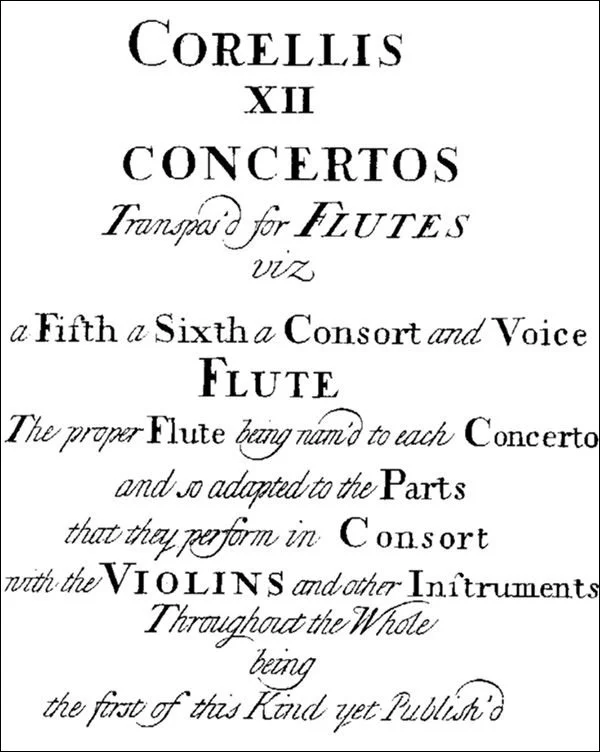
The piece I’m focusing on here is Corelli’s Concerto Grosso Op.6 No.8 - often known as his Christmas Concerto. During the 18th century an alternative edition of it, with the solo violin parts transferred onto recorders, was published by John Walsh, with the advice that it could also be played as a trio sonata. That’s exactly what we’ll be doing - using two recorders, cello and harpsichord.

Day 1 - let’s get started…

Although this is Day 1, I’ve been practising the Corelli for a couple of weeks already, so let me explain my journey to this point. But before that, here’s one passage which particularly needs my attention - the semiquavers from bar 70 to 80. The image below is a snap of my own copy, complete with my pencil markings, which are intended to help me play it better.

Corelli Christmas Concerto, 4th movement - Adagio-Allegro.

Let’s begin with a brief introduction to the music and this new project…

Although I’ve played this piece before, I still need to asses how much work there is to be done, considering one or two small adjustments to make it feel more recorder-friendly…

The next step is to identify where I’m particularly prone to glitches and mistakes. I mark these in my music as a warning, reminding me that I need to concentrate even more in these spots.

Next I explain the way we learn when we practise and what goes on inside our bodies to make sure the work we’ve done stays done!

I wrote another blog post about this topic last year and if you haven’t already read it, I strongly suggest you do. When I learnt all about the magic of myelin it was a real game changer for me - you can read all about it in my blog post here. In these early stages, practising slowly is the best thing you can do, ensuring you’re not learning mistakes into the music.

Do you love your metronome? I love mine!

Used in the right way it can be a fantastic tool, especially when you want to gradually increase the speed of a piece of music. Here I talk about the way I use a metronome when I’m practising.

If you want more metronome top tips why not take a look at my blog post all about this brilliant and much maligned tool?

But how does a metronome help you increase the speed of the music? I have a cunning plan which, with a little patience and persistence, is utterly foolproof - watch it in action here…

Having explained my strategies for the early days of practising a difficult passage, let’s see if the work I did yesterday has stuck, and find out which bits still need some polishing…

If you feel you’re making good progress, a clever way to test this is by making the music even harder. Let’s take a look at my own strategies and how well they can work…

It’s very easy to get caught up in thinking about your fingers, forgetting about all the other things you need to consider at the same time! Here I talk you through some of these:

Have you ever tried practising the music backwards? I did just that and discovered that it can be another really useful strategy!

How long should we practise for and how often? Here I ponder the ins and outs of practice routines. You might be surprised how much you can achieve in a modest amount of time if you practise in the right way.

In today’s practice session I realised that hidden dangers occur when familiar patterns change…

My final snippet from today’s practice session - let’s see how much progress I’ve made…

Now it’s time to go and do some different work - I’ll return in a few days with some more updates and glimpses behind the scenes, warts and all!

Day 2 - more thoughts on alternative fingerings, relaxation and when to feel you’ve really fixed a problem

After a good night’s sleep I’m back on the case, now turning my attention to a different section of the music, shown in the image below. Once again you can see I’ve marked the groups of notes which need my attention.

Corelli Christmas Concerto, 6th movement - Allegro

I started this project to help you with your practice, but looking back at the previous day’s clips I realised they had their uses for me too!

At what point can you say you’ve really mastered a passage? I consider this today and find out if I can put my own advice into practice…

My final thought for today - using smooth or detached articulation.

Day 7 - getting to grips with slurs and changing gear

Five days have passed since I last spoke to you, but I’ve been practising every day, making incremental improvements. Each day new ideas occur to me, so let me explain some of my latest discoveries with you…

We’ll start off by thinking about how I can control the movement of my fingers more effectively while I’m playing slurs.

There comes a point, when practising with a metronome, that a gear change is required. As I’ve gradually increased my speed that moment has arrived - here I talk you through my thought processes on this.

Here we have a fresh scan of my music. Over the days I’ve gradually added a few more markings, to help remind me what I need to think about and where. These include updates on where my metronome practice has got to, and notes about the specific fingers I need to work more efficiently as I play.

My final thought for the day is when you should stop practising. Concentration is a finite resource - knowing when your allocation for the day has run out will help you practise more efficiently and effectively!

Day 12 - playing with other people and trying to overachieve

After a weekend off and a rehearsal with my colleagues I have a much clearer perspective on how successful my practice has been so far…

Playing the music at the right speed is one thing, but it pays to build in a margin for error. Here I look at my aims for the remaining few days before our concert.

Finally, I consider the possibility of making mistakes during the concert - after all, no one is perfect!

The final countdown…

As I publish this post, we have six days left until our concert, but will I be ready for whatever a live performance can throw at me?

I’ve practised in a thoughtful way, taking small steps to work on my weak areas. At no point have I spent more than an hour a day on my practice, but instead I’ve focused the bulk of my attention on the passages that need the most work.

What about the rest of the concert programme?

Alongside the Christmas Concerto I’ve spent shorter periods tidying up the other pieces. It’s rare to perform an entirely new programme in any concert, so many of the other works are ones I’ve played before and know well. I keep these ticking along in parallel with the Corelli, but the good quality practice I’ve done one them in preparation for previous concerts means they don’t need the same quantity of work.

Have you enjoyed this glimpse behind the scenes?

Practice can seem like a dark art. People talk about it a lot, but how often do you get to see and hear exactly how a professional practises?

I hope this look behind the scenes has given you some inspiration for your own practice sessions. Please bear in mind I’m coming to this work as someone who’s spent many years studying; developing my technique and musicianship. Some of the music I find easy may seem like an impossibility for you at the moment, especially if you’re still near the beginning of your recorder journey - please don’t let that put you off. All of the techniques I’ve talked about and demonstrated in these video clips can be modified and used in your own practice sessions. Your tempi may be slower, and your pace of improvement may be more modest, but I absolutely believe that anyone can become a better musician and technician if they practise in the right way.

If you’ve found this video diary helpful, please do let me know by leaving a comment below. Is this something you’d like to see more of? If so, are there specific topics or techniques you’d like help with? I have lots of ideas, but they’ll be so much more meaningful if I know what you’d like help with.

Behind the scenes with the Score Lines videos

One of the questions I’m asked most about the consort videos I’ve been making for the last two years is, “How do you make them?”, closely followed by, “It must take you hours!”

There was a time during the first Covid lockdown that professional musicians everywhere seemed to be creating multitrack videos, often as a way to remind people we were still out there, even if we couldn’t play to a live audience any more. I didn’t jump on the bandwagon immediately as I was enjoying the opportunity to have some genuine down time at last. I soon became aware how much the people with whom I normally work (amateur musicians like yourself) were missing being able to play in ensembles. I too was missing my musical interactions with others and it struck me that maybe there was scope for me to create some resources to help others.

Recording in action

First steps

While I’ll happily admit I’m a bit of a geek, I don’t have any real experience of video - stills photography is much more my cup of tea. I didn’t want to spend hours editing and grading video content from a proper camera so I did some research about simple ways to make a multitrack video. I quickly hit upon an app called Acapella which can be downloaded to your smartphone. I found some helpful videos on YouTube by flautist Gina Luciani explaining how it works, so I downloaded the trial version and had a play. Incidentally, if you fancy trying this yourself, I believe the iOS version (intended for iPhones) is more fully featured than the Android version. Of course, there may be alternatives out there which work better on Android too.

Shortly before the pandemic I’d bought myself a pair of good quality wireless earbuds, to listen to music on the move, so I figured I’d use them to record my videos. Imagine my disappointment when I tried Acapella and none of the tracks quite knitted together - I was ready to throw the whole kit through the window! Consulting friends who are more technically minded than I me, I discovered there is a slight delay in the way sound plays through a Bluetooth wireless device - sufficient to cause my problems. Instead I went back to my old wired earphones and things worked much better.

One of my first projects was a recording of Holborne’s The Fairie Round - a classic of the Renaissance consort repertoire, with lots of fun cross rhythms. This worked moderately well and I shared the result (which you can see below) with friends on social media. This made me think perhaps there might be some mileage in exploring further…

Next step - figuring out what might be helpful to others

By this stage (May 2020) there were other musicians already creating play along videos for recorder players. Looking at these more closely, they all comprised just the music, with little or no indication of the speed or help to get started. I know from long experience that many players find the gestures of a conductor helpful so I pondered if it might be possible to include this in any resources I produced.

I decided to start with something simple - a trio of Bach Chorales. I’ll explain the process I now use to record in a moment, but for these I began by playing the music and then added a conducting track. In between each chorale I offered a few words of advice to camera about tempo and how you might tackle them. I then popped them on some of the recorder groups on Facebook, along with the music, and asked if anyone might find them useful. The response was very positive - much to my relief. The finished product was pretty rough and ready, but I could see there might be a demand for such offerings if I could come up with some more.

My next project was a Chaconne from The Gordion Knot Untied by Purcell - a piece I’ve conducted with many groups over the years. For this I began the pattern I’ve maintained ever since, with a recording of the music, plus a separate ‘Hints and Tips’ video. I figured the chat between movements would quickly become irritating for anyone who played along with any piece regularly, so it made sense to separate them. Whether everyone watches both videos is something I can’t track, but I know many people find my thoughts helpful and I do my best to offer some useful advice with each consort.

Gradual additions to the technology

When I began recording my videos I started with the Acapella app on my phone, mounted on the tripod I use for my photography, along with the pair of basic wired earphones which came with my iPhone. Since then I’ve made a few additions to my kit, with a Rode VideoMicro microphone (plus an adapter which allows me to connect the mic and a pair of earphones to my phone). This addition offers much better quality sound. It can also be adjusted to cope with a greater dynamic and tonal range. The recorder may not be an especially loud instrument, but its pure tone (especially the higher members of the family) means it's easy to overload the microphone. I now know to have the sound level adjusted to about one third of the maximum to avoid any painful high notes.

A close up of my phone setup, with microphone, adapter and cables. You don’t need anything other than a basic pair of wired earphones to get started if you fancy trying this yourself!

Another addition was a Rotolight NEO 2 video light which I bought second hand. I record my videos in from of our dining room window (much to the amusement of our postman as he passes the window), which provides good illumination from one side, while the left side of my face faces the darker end of the room. Using the video light provides fill light to lift the shadows and means I can record on dull winter days without it looking too gloomy.

My Rotolight NEO on a simple light stand to add illumincation

Figuring out the process

Learning how to get the best from the Acapella app has been a process of trial and error. Gina Luciani’s videos got me started, but from there I just had to jump in and play to get the results I desired. It’s taken lots of experimentation to find out what works best for me, the acoustic of the place I record and the sound of the recorder. Here’s a brief explanation of my process in case you fancy having a go yourself…

Setting up the Acapella app.

Once you’ve chosen your piece you need to select a layout and Acapella offers an impressive range of options. I general use a square layout for the multitrack videos, while for my Hints and Tips videos I go for a portrait format frame. As you can see here there are many options, but for my purposes I always pick a large frame for the conducting track (so you can see my gestures better) and smaller windows for the instrumental parts.

The next step is to pick the length of video. The trial version of Acapella limits you to 30 seconds (long enough to get a taste of whether you might wish to pursue this further) but the paid version (around £42 for access to all the bells and whistles for a year but you can pay monthly if you want to give it a try before committing) can accommodate videos of up to ten minutes - plenty long enough for my purposes. You can set a specific length of time (if you know exactly how long your piece of music is) but I tend to choose ten minutes and then stop the recording when I’ve finished playing.

Next you need to set up the metronome. No matter how rhythmic we think we are, it’s almost impossible to adhere to a perfectly consistent beat unaided. The ability to set a metronome pulse (which plays through my earphones as I record) is invaluable, although there are times when I curse it. More about that later…

The app offers you a choice of time signatures and metronome speeds from 60 to 180. On the rare occasions I need something slower (say 50) I’ll just set a speed of 100 and use it as a subdivided beat. When I’m recording the hints and tips videos I simply turn off the ‘play tempo’ option as I don’t need a pulse to distract me when I’m talking to the camera!

The final set up screen relates to the microphone. This is relevant whether you’re using the microphone built into your earphones or an external mic like mine. Even with a relatively soft instrument like the recorder, setting the microphone level to maximum will result in all sorts of distortion - as you may have heard in some of my early efforts. As you can see from this screenshot, I set mine at no more than one third, although I might increase this a little if I’m recording a piece solely on low recorders. To determine the right level, I just play a range of pitches into the microphone and watch the green on screen meter to check they don’t exceed what the microphone can cope with.

The settings lower down the screen relate to the monitor. This is the sound that plays through your earphones - both the live sound that you’re recording and the tracks you’ve already recorded. This is important so you can hear the tuning between the various voices.

Now it’s time to record!

With all the set up done, the fun bit begins. I tend to start with the bass line and work upwards, but it’s worth trying different approaches - you may find it easier to begin with the descant and work downwards. I’ll talk a little more about the challenges and how I deal with them later.

Acapella gives a countdown on screen to tell you when the microphone becomes live. Then it’s simply a case of playing in time with the metronome beat that’s audible through the earphones. If you find metronomes challenging, my top tip here is never to tap your foot at the same time - you’ll always follow your foot as it’s part of you! When you’ve finished, the app asks if you want to have another go, or if you’re happy. Pressing continue offers you a chance to listen to what you’ve just recorded. If you like what you hear, selecting the green tick triggers the app to render the track you’ve laid down, saving it and the allowing you to record the next one. From there it’s a case of rinse and repeat until you’ve recorded all the voices.

Tweaking the sound settings

The final step is to adjust the sound of the various tracks before you save your finished video. There’s a huge array of options, but I keep it pretty simple. My dining room has a relatively hard acoustic, so I add some reverb to soften the edges and a little hint of echo. A carpeted room would absorb the sound even more so might need a little more assistance to add a little bloom to the end result. The engineer who recorded my CD described this as adding ‘fairy dust’ - that magic quality which turns the dry acoustic of one’s living room into something more flattering! I’ve experimented with using even more reverb but in my experience that just feels too extravagant.

Export and share with your audience

Finally, it’s time to export the completed video and share it with the world! Once you’ve named the video you save it to your Acapella account (I tend to save mine as private files rather than public) and then you have an option to save it in other ways too. I export a copy to my iPhone photos, but you can also share it by email, WhatsApp or on social media from here. One of the options is to select Full HD output (the best quality Acapella offers) or 720P. While it would be wonderful to go for the quality of HD, I generally opt for 720P as the file sizes are much smaller for my subscribers to download them later.

To play or conduct first?

So far I’ve talked about the technical process of recording my videos, but I’ve faced practical decisions along the way too. The first of these is whether to record the conducting or playing tracks first. With a metronome to keep me in time one could argue that the playing could come first. However, doing this presents problems if there’s a tempo change in the music. Because of this I tend to lay down the conducting track first. I spend a few seconds showing my intended speed before giving a bar for nothing and working my way through the piece, conducting at the speed of the metronome best in my ear. If there’s a rallentando at the end I then have to ignore the click of the metronome and indicate the degree of slow down I’m after. This takes a good degree of willpower, but I’ve become quite good at listening selectively when I need to!

Of course one of the most challenging aspects of beginning with the conducting track is the fact that I’m doing so in complete silence. Normally I would respond to the players I’m working with, but here I have to know the score well and give the gestures I would expect to offer to a group of live musicians. From time to time our postman will walk past the window as I’m doing this and I’m sure he must think I’m doing some obscure form of tai chi!

A matter of intonation

The other big challenge when recording multitrack videos is that of intonation. Playing with other musicians in real time is always a game of give and take. You listen to each other and make micro adjustments to the pitch of notes, to make the tuning sweet and true. With multitrack recording this isn’t possible. Once the first track is laid down it’s an immovable object which doesn’t respond to later inputs. This is one of the reasons I begin with the bass line as I can then layer up the other parts on top to fit with it.

So how does one make sure the harmonies are true? This is where it helps to know a little about the way chords work. You may have heard conductors and teachers talking about adjusting the individual notes in chords to obtain pure intonation. This usually entails making the 5th (the G in a C major chord, for instance) quite bright, while the 3rd will need to be altered depending on whether you’re playing a major or minor chord.

A major third (E in our C major chord) will sound sweetest when played a touch flatter, while a minor third (E flat in a chord of C minor) will want to be fractionally sharper. Next time you play with friends try experimenting with this by playing a major chord and varying the pitch of the third - a little higher, a little lower. A really bright major third gives the chord a sour, grating quality. In contrast, lowering the third a little (you can adjust your breath pressure or shade a finger over one of the holes) will make the end result much sweeter and the third almost seems to melt into the chord.

This is the very process I go through as I record each video. For this reason I always record from the score if I can, as it enables me to identify the position of each note within the harmony and adjust its pitch accordingly. This takes a fair degree of mental gymnastics, but experience of conducting from scores and playing basso continuo from figured bass has taught me many of the patterns to expect. Of course, months of making these videos has also helped me learn the foibles of my recorders intimately. I now know where to ‘place’ certain notes using breath pressure or minor adjustments to fingerings to hit the mark. There are inevitably places where I don’t get things right for every single note but I’ve never claimed to achieve recorder consort perfection!

Getting it right first time

When we listen to professionally made recordings we naturally assume the performances we’re hearing are absolutely perfect. The reality is that most recordings (except perhaps ones made in live concerts) require some editing to remove small glitches and errors. In a post last December I talked about the way we expect perfection of ourselves – an expectation which is simply unachievable.

Professional musicians aim for perfection but we’re as human as you and that’s why we have recording engineers who can record snippets to patch into the finished performance to create the illusion of perfection. Sadly I don’t have a tame recording engineer to hand, or the skills to do this myself, and the Acapella app doesn’t offer this option in any case. This means I have to get as close to perfection as I can and accept that every video I produce will inevitably contain some imperfections.

As I record each track I am continually analysing any errors I make, deciding whether they’re absolutely unforgiveable (in which case I stop and begin again) or whether they’re small enough to be overlooked. When I was at music college my recorder teacher would admonish me for being ‘too neat and tidy’. He was looking for more spontaneity and freedom in my performances. I like to think I’ve loosened up over the years, but that tendency towards tidiness has proved to be a boon when recording videos! That said, there are inevitably times when I make stupid errors and have to record a track multiple times. If you imagine you’re the only person who slips into the wrong fingerings or makes daft errors don’t give yourself too hard a time – I do it too. I recall one contrabass part which I recorded five or six times because my brain insisted on sending me into great bass fingering!

I know from experience of recording CDs that if something doesn’t come good in the first couple of takes it will often get worse before it gets better. Think of those old TV programmes showing outtakes of famous actors fluffing their lines. They’re funny because generally they make ever more mistakes with each further attempt, so take 17 is usually much worse than take 2! Musicians are no different. Sometimes you just have to walk away, go and have a cuppa, and try again later. The same goes for my Hints and Tips videos where I sometimes find myself incapable of stringing together a coherent sentence. Fortunately, I don’t save the outtakes, so you’ll never get to enjoy my ineptitude!

Now you can have a go!

So there you have a glimpse behind the scenes of my consort videos. If you fancy having a go yourself I would encourage you to go ahead and try. You don’t need expensive equipment – a smartphone and the wired earphones that were supplied with it are enough to get you started. Yes, it can be frustrating when you make daft mistakes, but that’s all part of the learning process. Even if you never share the results with anyone else, I can guarantee you’ll achieve a greater understanding of your musical strengths and weaknesses and it’s fun too. I know some of you have already tried this and I was delighted to see some of my own videos being used as a starting point for further collaboration by my subscribers. I’d love to hear how you get on if you choose to jump in and have a go – do leave a comment below or drop me an email to tell me about your experiences or with any quesitons.